
Ideas can come in many forms. Sometimes they come fully formed in your mind with seemingly no effort whatsoever. Sometimes you only get a whisper of an idea, as if looking through a thick fog, you have a vague idea but nothing concrete to really go on. An idea that takes a lot of time and effort before it’s fully formed.
One isn’t necessarily better than the other. Sure, a fully formed idea is great and we’re lucky when we get them. But it just means it’s a quicker process from idea > final image. That doesn’t mean those half-formed ideas are any less good, or relevant, it simply means you need to work a little harder in order to bridge the gap between idea > final image. Sometimes those types of images are all the more rewarding.
Take my latest image Kingdom of Ends. The idea presented itself fully formed in my mind before I even began sourcing stock images. I knew exactly what I wanted the image to be, a general idea of the stock I would need and the colour palette I wanted. All I really had to do was to actually put it all into practise and materialise it on screen.

Kingdom of Ends, 01/11/20
The image I want to talk about today, however, was the opposite.
I’m writing this blog as I go. Whereas I would usually write a blog retrospectively once the image has been finished, this time I’m going to take you along from conception all the way through to the final image.
At this point I don’t know if the image in question will work (to be honest I don’t even know what this image is really going to be), but regardless I’ll persevere because I think it’s important not just to show you the finished image, but to explain how I arrived at it. And not just the technical aspect of creating an image, but all the work that goes into getting an idea to the point where you’re ready to create is equally (if not more) important!
Phase 1
The first thing to talk about is the initial idea. For the last week or two I’ve been reading up on the Cottingley Fairies. It’s a story that’s both intriguing and enchanting, sounds right up my alley, eh?
For anyone unfamiliar with the story allow me to fill you in. Over the course of 3 years from 1917 to 1920 two cousins, Elsie Wright and Frances Griffiths who lived in Cottingley, took photos proving the existence of fairies. With Sir Arthur Conan Doyle believing the images, even publishing them in The Strand Magazine, this had to prove fairies were real?


If only. After much media and public speculation it wasn’t until the early 80s, some 60 years after the original photographs were created, that both Elsie and Frances admitted they had faked the photos using cardboard cutouts.
It’s a very interesting story and if you’re so inclined you can read more about it here.
Now I wouldn’t say I'm inspired by the actual photographs, I don’t want to recreate them per se. What it is for me is that sense of wonder and enchantment that I want to recreate. Imagine being alive in 1917 when there was no social media, no internet, and photography wasn’t as readily available as it is now, imagine hearing about and seeing these photographs, would they have been believed outright or were people just as cynical 100 years ago as they are in the social media age of today?
I’d like to believe there would be some wonder left in the world back then and perhaps people were excited and delighted at the possibility fairies might yet still exist. So for my image I want to try and capture that magic. The innocence and enchantment a child possesses where nothing is impossible – that’s what I want to craft. What that looks like? I have absolutely no idea.
So that will be my next task, I plan on doing a bit more inspiration research to see what ideas spark and hopefully have more of a solid idea soon!
Phase 2
Next I go researching other fairy-type images. For this I use sites like Instagram and Pinterest, I don’t need to focus too much on the source of these images, because no one but me will see them and they’re only to give me inspiration, I'm not going to write an in-depth article about them. I just want to soak everything up like a sponge so that when it comes time to create my own image I have all that arsenal at my disposal.
Below are a couple of mood boards I will use as a basis for my piece:
at this point, with further research completed I still don’t really have a clear idea of what I want to create. Although an early frontrunner is something along the lines of this image:
Titania - John Simmons (1866)
I love the softness of the image, the colours and the depth of the background, so I think going forward this is the direction I’ll begin to go in. Now what I’m going to do is go through my own photography to see if there’s anything I can use for stock, although I don’t think I'm going to find much in my own images so the next port of call will be to look for stock images on the net.
Phase 3
Turning my attention to sourcing the stock images, the first place I go is to my own photography, looking to see if there’s anything I can use. As I thought a few days ago, nothing really stands out in my own images, which isn’t such a bad thing. While I like using my own photography in my work as much as possible, I love using other people’s stock images just as much. At the end of the day it’s just as much their hobby to create stock as it is mine to create art, so it’s a good balance.
The first place I look is always DeviantArt. I've been a member for over 14 years and the other members always have brilliant stock to use so I’m certain I’ll find something suitable. First I look for background images, with this piece I want it to be set in a forest, so that is my main focus right now – gorgeous foresty images with a lot of depth.
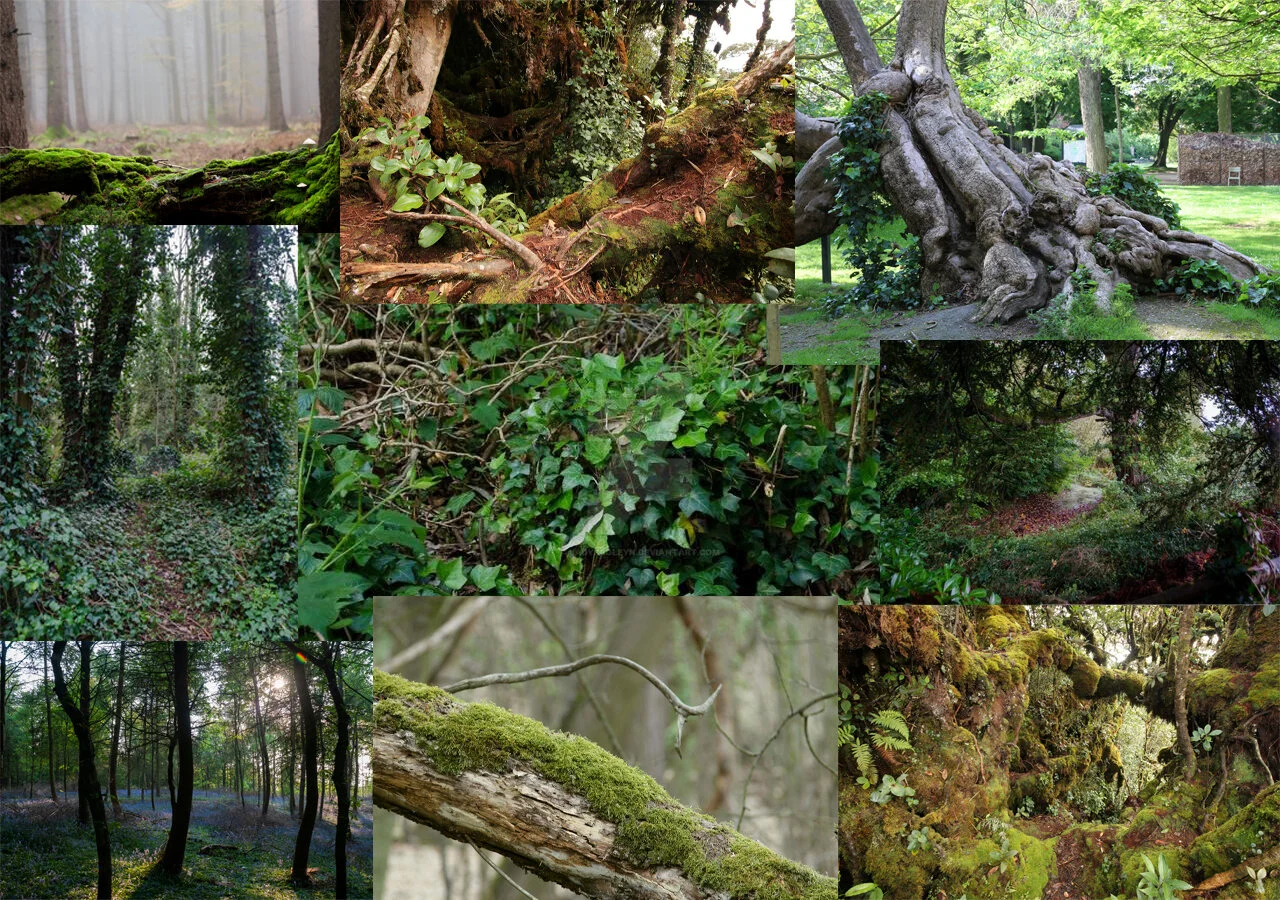
A selection of some forest stock from DeviantArt.
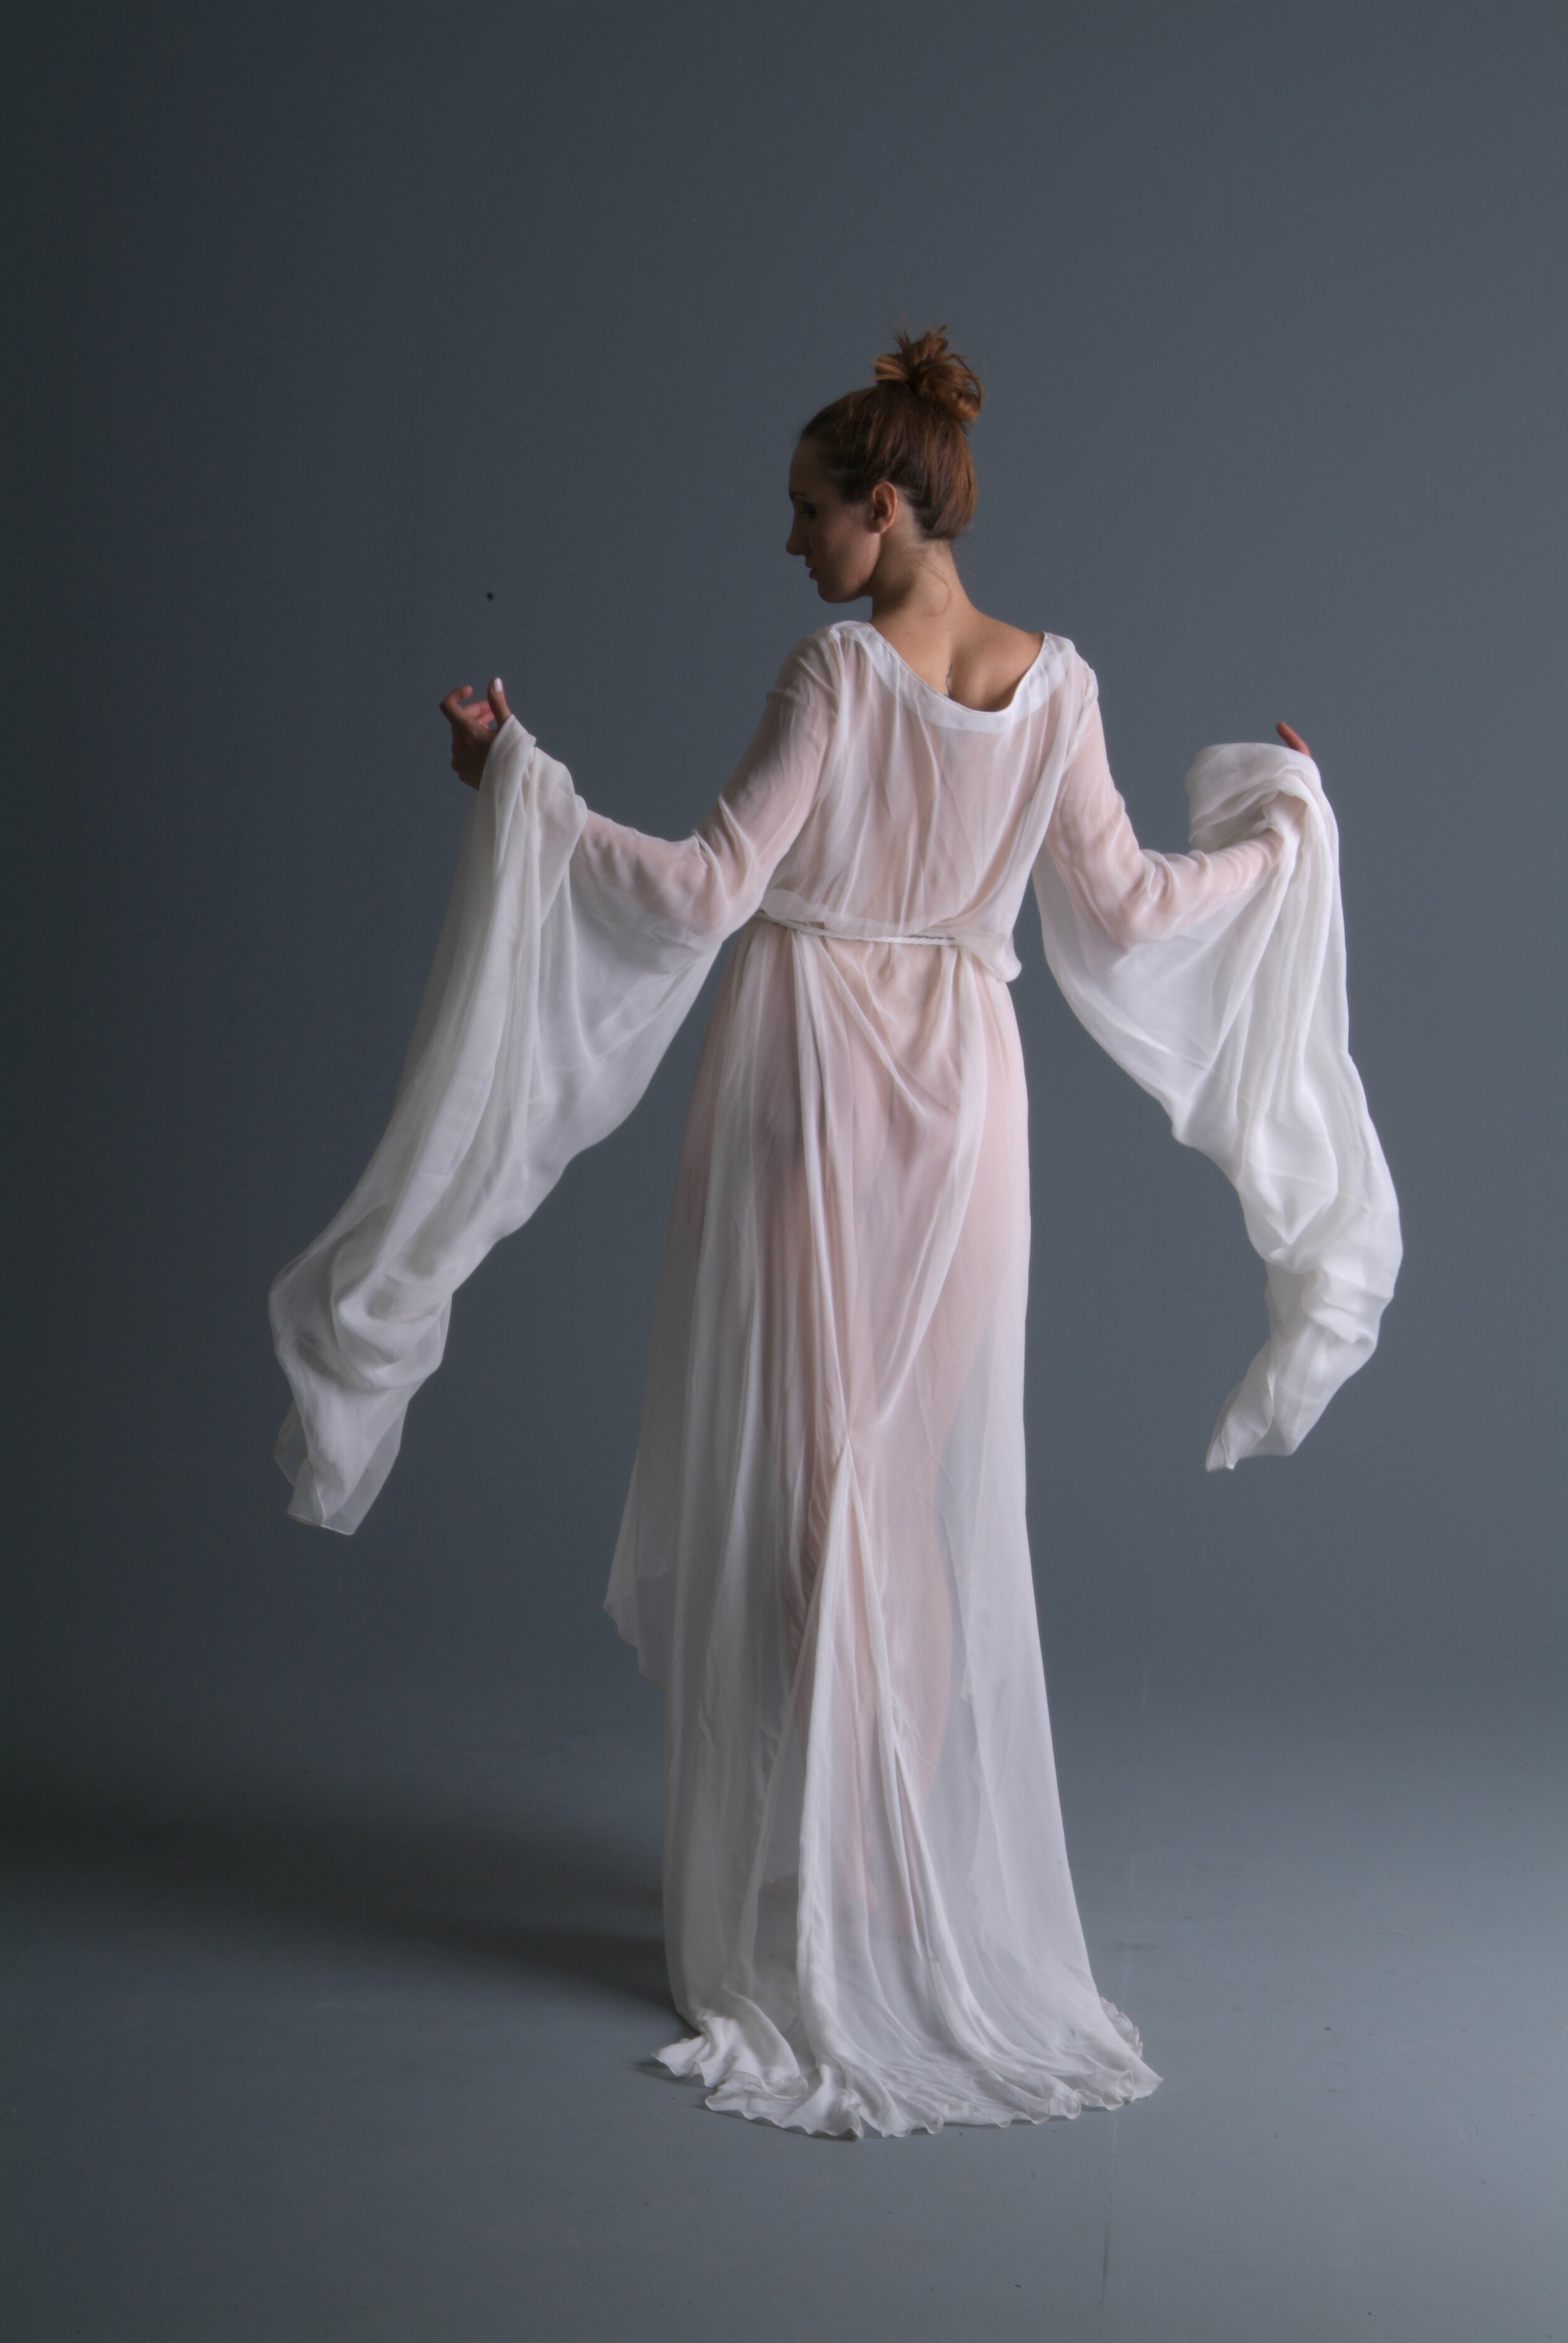
Now that I’ve got a good selection of forest images to chose from I next need to look for model stock images, always keeping in mind the location images to make sure the model/pose fits (lighting and angle-wise). This part of the sourcing might be a little more difficult seeing as it’s so specific, and the pose I want is also quite particular, it’s just a matter of trying to find images that fit my vision and eventually compromise on a pose I think will still suit, even if it’s not 100% what’s in my mind.
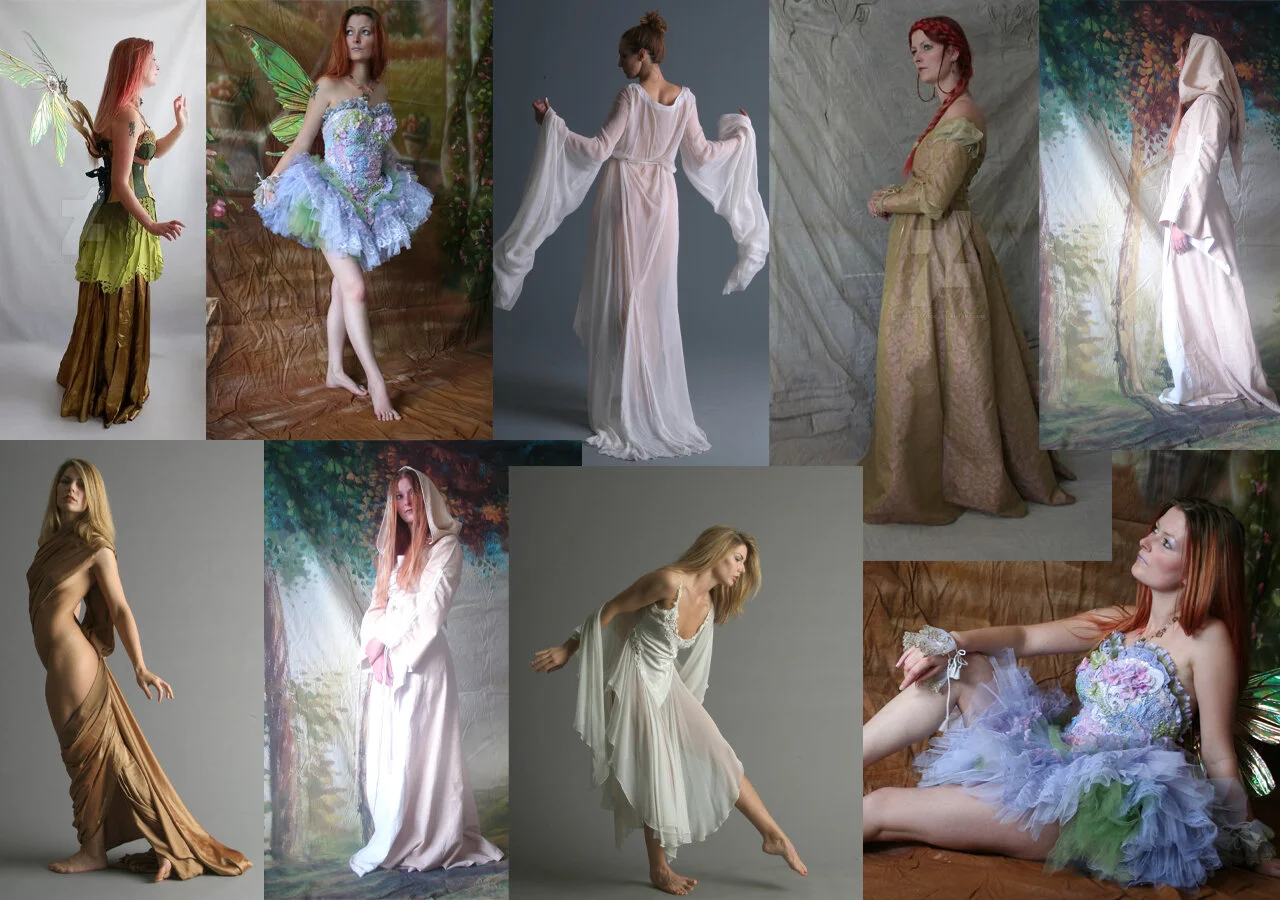
A selection of some model stock from DeviantArt.
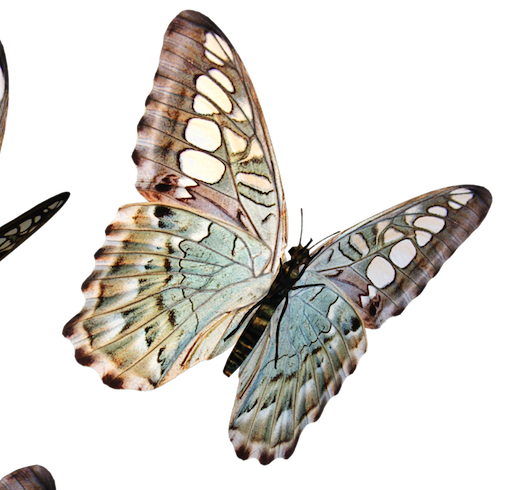
Next I just need to find some butterfly wings to use in the image similar to John Simmons’ Titania. Butterfly wings never occurred to me when making fairy images, I always thought of fairy wings similar to dragon fly/bee wings, but it’s a nice change so I think I’ll stick with butterflies for now because I'm sure I’ll get some lovely patterns on the wings to make the image really pop!
Phase 4
With all my stock images assembled comes the fun part, and the most daunting – creating the rough draft. It’s here I’ll get my first glimpse of what my image will look like. I’ll be able to tell if my instincts were right when sourcing the stock images. Usually I just develop an idea and start the editing process straightaway. Sometimes it works, sometimes I go back and forth substituting different stock images in as nesescary, but this time I’m going to create a few rough drafts to get a feel for the stock images and also to see what direction I want my image to go. I still like the Titania idea, so I’m going to try and stick with that inspiration when creating my roughs.
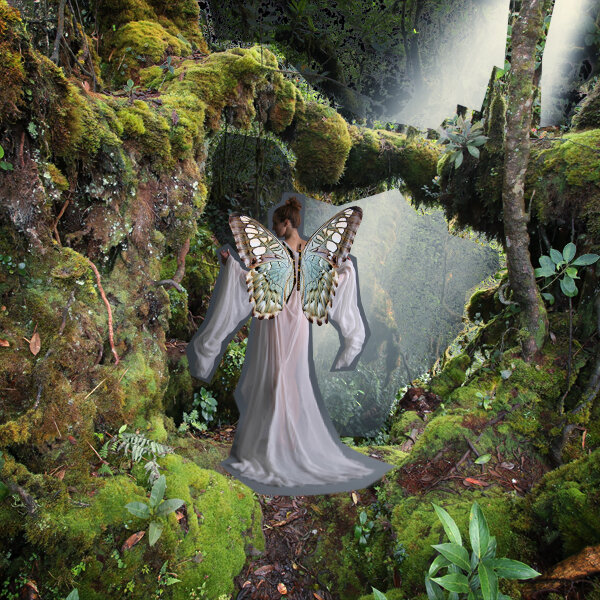
After a couple of hours I’ve created three possible options for my image. I made them square format just for the sake of easiness and also because the image will be uploaded to Instagram so a square is what everyone will see. I might however change the dimensions when I chose my final idea, and that’s something I’ll keep loose throughout the creation, as it’s easier to crop an image at the end, than to try and extend its borders after everything has been blended.
Out of the three rough drafts I’m drawn to the first one. I think it both captures the magic of the Cottingley Fairies and is also along the same lines as the Titania inspiration. The other two I just think are lacking something and I like the first rough enough that I don’t want to pursue the other two any further.
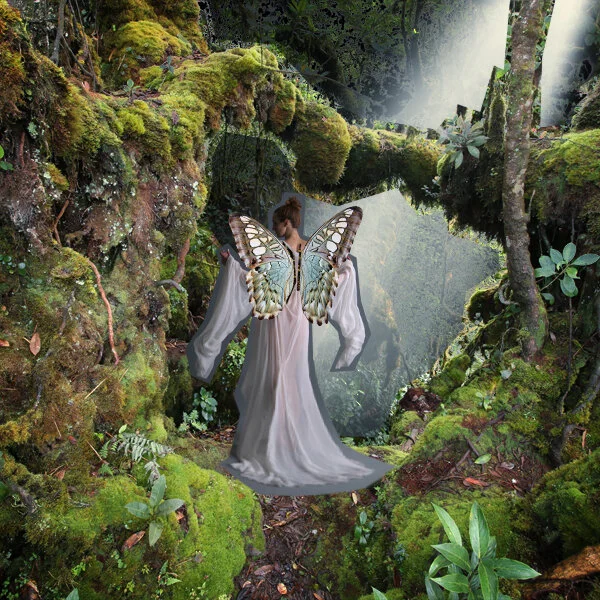
Final rough draft I will base my image on.
Now comes the real work. I need to actually produce this image, and with all the foliage I have a feeling this will be very time consuming, but if the vision in my head translates onto Photoshop I think it will turn out brilliantly!
Phase 5
If you want a more in depth look at my process for the actual creation of my art you can look at my last Behind the Process article. The techniques I’ll be employing with this image will be the same; blend, light, colour, paint, texture, finishing touches.
I was quite surprised that there was actually only three central images to this piece, which is very little compared to my usual artworks. I haven’t did an actual count but usually I feel I use anything between 5-10+ images in one piece of art! Here’s the stock I used for this image:

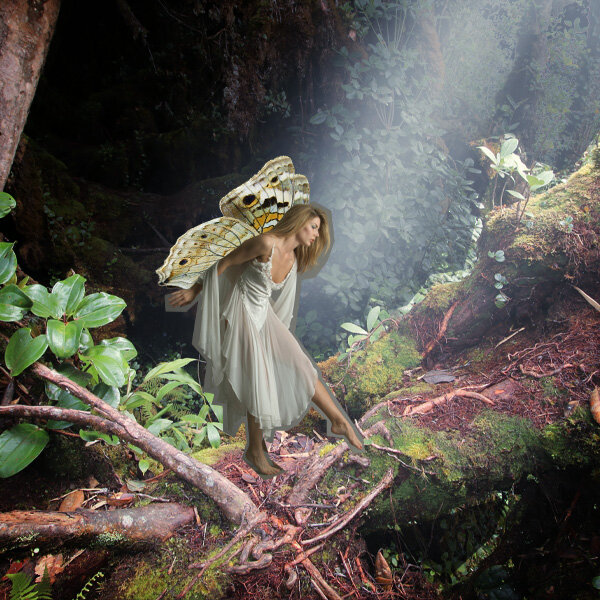
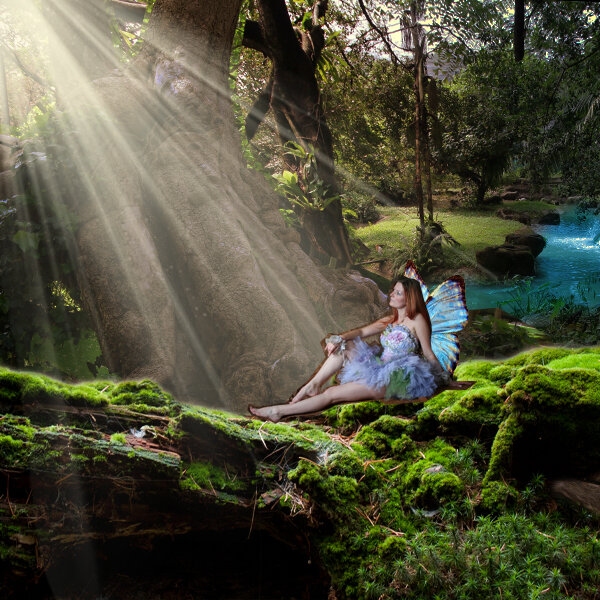
As I went through the editing of this image the most time consuming part was definitely cutting out all the foliage (as I suspected) in order to get the light beam shining through the forest rather than in front of it.
The extra time taken, however, really paid off as I think the light beam and mist adds a lot of depth to the image. I feel the finished product turned out great, it’s enchanting, romantic, fantastical and a lovely (I hope) tribute to my original inspiration; the Cottingley Fairies and John Simmons’ Titania.
The Secret Wildwood, 09/11/20
I hope you enjoyed this little look Behind the Process, albeit slightly different but I hope it was an interesting look into how I create my work. Not just the act of creating my art physically, but how I get from the basic idea (sometimes not even an idea at all, just a vague collection of thoughts) to the finished product!